Hello,
IBM Blockchain is based the Linux Foundation’s open source Hyperledger Fabric project, although not all implementations of Hyperledger Fabric version 1.0 ALPHA are also IBM Blockchain. At the time of this writing (May 2017), the Hyperledger Fabric project is at version 1.0-alpha, targeting a launch for version 1.0 proper sometime in mid to late June.
Update 2018-05-03 fixed a Powershell command typo caused by WordPress converting to HTML special characters.
What we intend to build
After a quick overview of what is this blockchain technology, I will step through the building of the recommended Linux Virtual machine on a Windows host, start Docker microservices running Hyperledger Fabric on that virtual image, build the fabric-sdk-java which can be found at https://github.com/hyperledger/fabric-sdk-java and run the java unit tests. Next, we will run the end to end Java integration tests. Finally, we will build the HTML documentation with Sphinx.
If you are faint-of-heart but nevertheless curious, complete text file listings of the operations will be provided below. If you want you, can simply go over those files first if building all this seems a bit too daunting.
Assumptions
If you intent to replicate, here are my assumptions:
You know how to set a new Windows system variable through the Control Panel > System. You have administrator privileges on your Windows box.
You are not daunted by command prompts.
You like to edit configuration files in vi on Linux.
You looked at the docs: https://hyperledger-fabric.readthedocs.io/en/latest/index.html
Ramp-up references and cool videos
There is a free self-paced course offered by IBM at https://developer.ibm.com/courses/all-courses/blockchain-for-developers/ which is helpful to understand the basics of blockchain and Hyperledger. You can follow it by logging in using a (free) IBM Bluemix account. But mostly this 10 hour course refers to Youtube videos, so in short, here below is just the good stuff. Some of the videos have dodgy titles which explains why they are so badly indexed on Google.
Use cases (9 minutes)
What is a fabric? (5 minutes)
Participants in a blockchain (3 minutes)
How Apps Use the Ledger (4 minutes)
Transactions (8 minutes, 5 stars!)
Integrating with existing systems (3 minutes)
Hyperledger Fabric Architecture (9 minutes)
Bluemix demo:
New terms you might want to remember:
- Practical Byzantine Fault Tolerance (PBFT) concensus protocol
- Ecerts (Enrollment Certificates)
- Tcerts (Transaction Certificates)
- Treshhold Cryptography
- Blockchain event
Overall Steps we will follow:
- Enable virtualization in the BIOS
- Install Chocolatey with Powershell
- Install Vagrant and Virtualbox with Powershell
- Install Cygwin with Powershell
- Install GnuPg on Cygwin using Powershell
- Install OpenSSH on Cygwin using Powershell
- Install Rsync on Cygwin using Powershell (this step might be optional)
- Install Ncurses on Cygwin using Powershell (this step might be optional)
- Install Git on Cygwin using Powershell
- Install Python on Cygwin using Powershell
- Install make on Cygwin using Powershell
- Install Sphinx on Cygwin using Powershell
- Install the Go programming language on Windows
- Create a Go working folder and set up a GOPATH Windows system variable
- Test Go in Cygwin
- In Cygwin, clone Hyperledger Fabric and the Fabric Certificate Authority with Git, clone the Java SDK, tweak the Vagrant config file and build the Linux Ubuntu virtual image
- Check the folders shared between Windows and the Linux virtual image
- Build Fabric and Fabric-ca inside Docker microservices running on the Linux virtual image
- Building the fabric-sdk-java and running the unit tests
- Running the end-to-end Java integration tests
- Building the Fabric HTML documentation with Sphinx
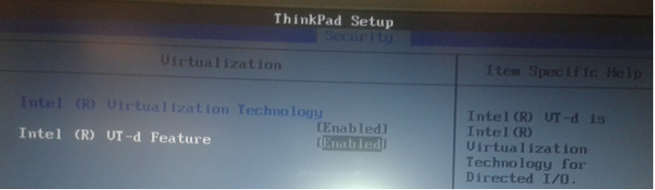
Enable virtualization in the BIOS
Required for Virtualbox.
Boot the PC go into the BIOS. Set the Virtualization and VT-d to enabled. I am running a Windows 7 box.
Install Chocolatey with Powershell
Chocolatey is a series of Powershell automation scripts which will help us install Vagrant, Virtualbox and Cygwin. Reference: chocolatey.org
Open a Powershell prompt AS AN ADMINISTRATOR. Commands:
Get-ExecutionPolicy
If the response is « Restricted » as here below :
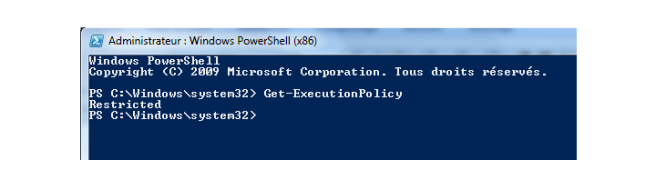
Then do both these commands (the Chocolatey site seems to say either is required, but I found both are):
Set-ExecutionPolicy AllSigned
Set-ExecutionPolicy Bypass
(and accept with Y for each)
Install Chocolatey with:
iex ((New-Object System.Net.WebClient).DownloadString('https://chocolatey.org/install.ps1'))
(and accept with Y)
Close the Powershell prompt.
Install Vagrant et Virtualbox with Powershell
Open a new Powershell prompt AS AN ADMINISTRATOR. Do command:
cinst vagrant virtualbox
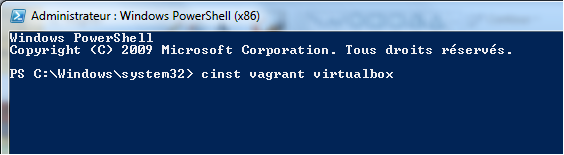
(and accept with Y)
Here a Windows reboot is required..
Install Cygwin with Powershell
Open a new Powershell prompt AS AN ADMINISTRATOR. Do command:
cinst cyg-get
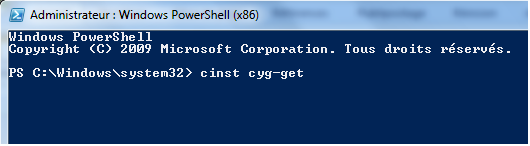
(and accept with Y)
Close the Powershell prompt.
Cygwin has now been installed under C:\tools but we will need to add a couple of features to it. Admittedly, a few of these commands could have been lumped together. They were the result of much hit and miss.
Install various useful development tools in Cygwin using Powershell
Open a new Powershell prompt AS AN ADMINISTRATOR. Do command:
cyg-get gnupg openssh ncurses rsync git make python python-sphinx
Install the Go programming language on Windows
Google’s Go programming language will be required BOTH on Windows and in the Linux virtual image. We have to worry about the former, the latter is handled for us. FYI, Go is also the programming language used to program the microservice container tool Docker.
Download Go from https://golang.org/dl/
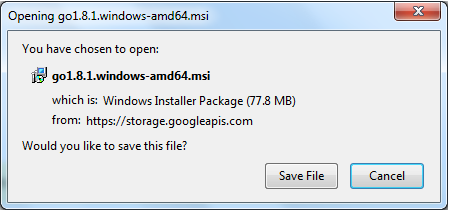
Install the MSI:
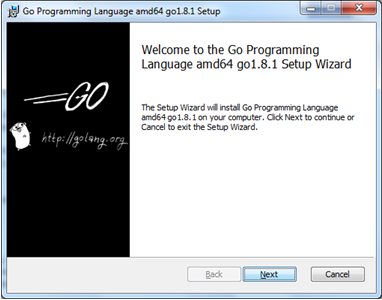
Accept all suggested values.
Add C:\Go\bin to the Windows system variables path. On my new Windows 10 laptop, this is found under Settings > System > About > System Info > Advanced System Settings > Environment variables button > System variables pane Edit button
Alternately, if you are lazy like I am, just create a new shortcut on your Windows desktop to sysdm.cpl and give it a name you like.
Create a Go working folder and set up a GOPATH Windows system variable
Create a new directory at the base of your C: drive called C:\gocode
Create a new Windows system variable called GOPATH with the value C:\gocode

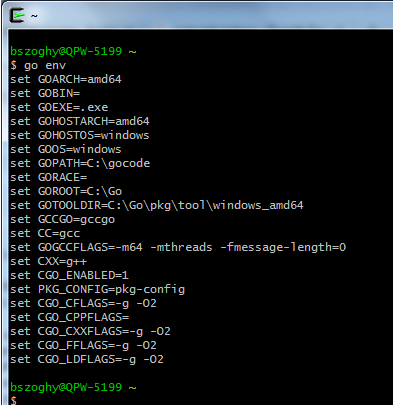
Test Go in Cygwin
Open a new Cygwin prompt. Type the command:
go env
This should display something like the following:
In Cygwin, clone Hyperledger Fabric and the Fabric Certificate Authority with Git, clone the Java SDK, tweak the Vagrant config file and build the Linux Ubuntu virtual image
Open a Cygwin prompt. Here we go ! The commands are as follows:
cd /cygdrive/c/gocode
mkdir fabric_java_latest
cd /cygdrive/c/gocode/fabric_java_latest
git config –global core.autocrlf false
git clone https://github.com/hyperledger/fabric.git
git clone https://github.com/hyperledger/fabric-ca.git
# here we specify the latest and greatest commit level. The commit level hashes are taken from the bottom of web page https://github.com/hyperledger/fabric-sdk-java
# if you substitute commit levels, YOUR MILEAGE MAY VARY.
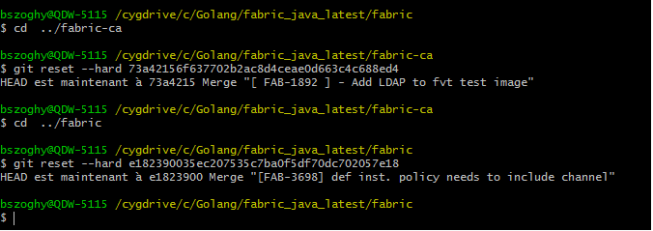
cd fabric-ca
git reset –hard 73a42156f637702b2ac8d4ceae0d663c4c688ed4
cd ../fabric
git reset –hard e182390035ec207535c7ba0f5df70dc702057e18
cd devenv
# Get the latest Java SDK in this folder, which will be synced between Windows and the virtual image:
git clone https://github.com/hyperledger/fabric-sdk-java.git
# In this folder you need to edit the Vagrantfile configuration file.
# Add the following block:
config.vm.network :forwarded_port, guest: 7056, host: 7056, id: “java7056”, host_ip: “localhost”, autocorrect: true
config.vm.network :forwarded_port, guest: 7058, host: 7058, id: “java7058”, host_ip: “localhost”, autocorrect: true
config.vm.network :forwarded_port, guest: 8051, host: 8051, id: “java8051”, host_ip: “localhost”, autocorrect: true
config.vm.network :forwarded_port, guest: 8053, host: 8053, id: “java8053”, host_ip: “localhost”, autocorrect: true
config.vm.network :forwarded_port, guest: 8054, host: 8054, id: “java8054”, host_ip: “localhost”, autocorrect: true
config.vm.network :forwarded_port, guest: 8056, host: 8056, id: “java8056”, host_ip: “localhost”, autocorrect: true
config.vm.network :forwarded_port, guest: 8058, host: 8058, id: “java8058”, host_ip: “localhost”, autocorrect: true
# Replace the config.vm.synced_folder block with the following:
config.vm.synced_folder “..”, “#{SRCMOUNT}”
config.vm.synced_folder “..”, “/opt/gopath/src/github.com/hyperledger/fabric”
config.vm.synced_folder “fabric-sdk-java/src/test/fixture/sdkintegration”, “/opt/gopath/src/github.com/hyperledger/fabric/sdkintegration”
config.vm.synced_folder ENV.fetch(‘LOCALDEVDIR’, “..”), “#{LOCALDEV}”
Optionally change the name of the Virtualbox image so it isn’t a duplicate:
vb.name = “hyperledger-java-latest”
Save the Vagrantfile file. Here is my copy of this file, note that I had to add a .doc file extension so WordPress would accept it. You should view it in Notepad++:
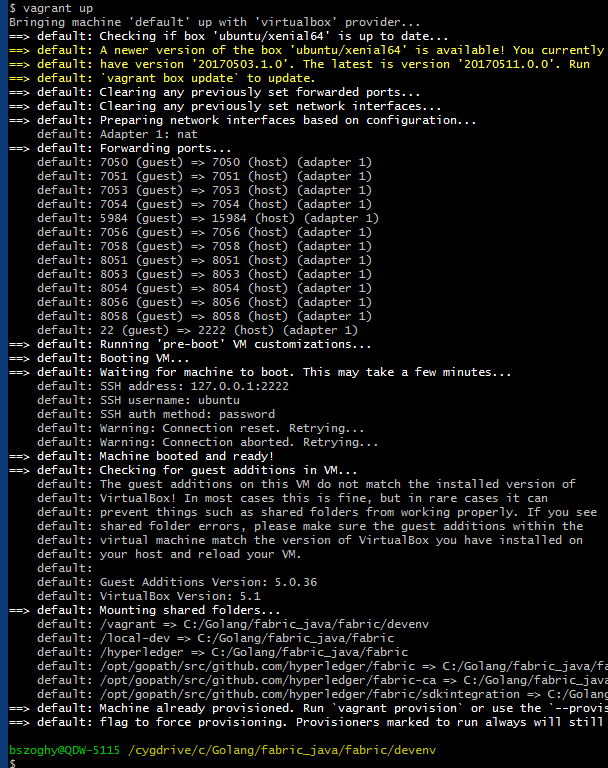
The rubber meets the road:
vagrant up
The following command will confirm it ran fine by showing 0:
echo $?
Here is the complete listing in a text file. I had to give it a “doc” file extension so WordPress would accept to insert it here, you should view it in Notepad++:
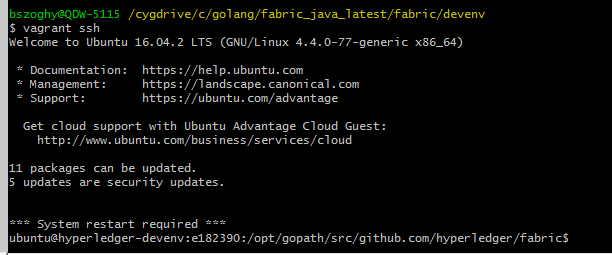
Next we connect to our running image using SSH with the command:
vagrant ssh
Check the folders shared between Windows and the Linux virtual image
Create 3 text files in Windows at the following locations containing « test test test » :
C:\gocode\fabric_java_latest\fabric\a.txt
C:\gocode\fabric_java_latest\fabric-ca\b.txt
C:\ gocode\fabric_java_latest\fabric\devenv\fabric-sdk-java\src\test\fixture\sdkintegration\c.txt
Next, in Cygwin , do the following commands:
pwd
cat a.txt
cat ../fabric-ca/b.txt
cat ./sdkintegration/c.txt
# You should see “test test test” as pictured below.

Build Fabric and Fabric-ca inside Docker microservices running on the Linux virtual image
Open a new Cygwin console. Type:
cd /cygdrive/c/gocode/fabric_java_latest/fabric/devenv
vagrant up
vagrant ssh
# In the Linux virtual image, do:
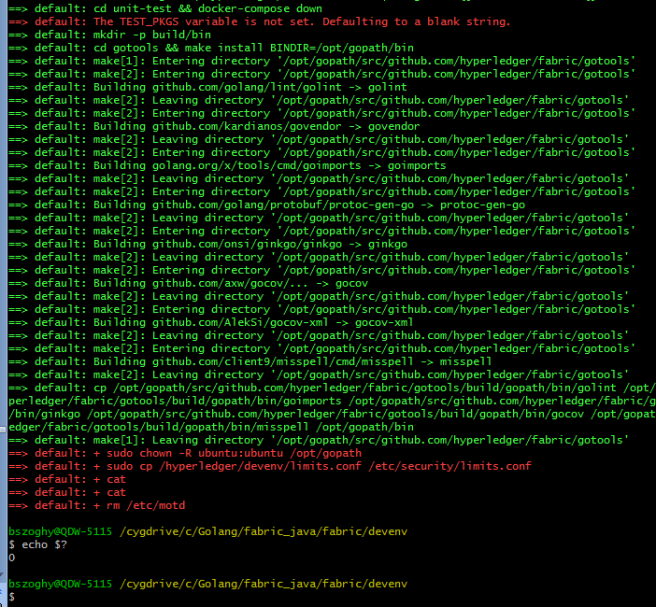
make docker
echo $?
cd ../fabric-ca
make docker
echo $?
cd ../fabric/sdkintegration
# this command will launch the Docker containers:
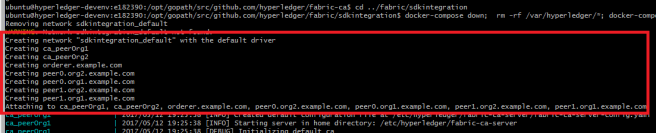
docker-compose down; rm -rf /var/hyperledger/*; docker-compose up --force-recreate
At this point, you are up and running !
It says below:
Creating network “sdkintegration_default” with the default driver
Creating ca_peerOrg1
Creating ca_peerOrg2
Creating orderer.example.com
Creating peer0.org2.example.com
Creating peer0.org1.example.com
Creating peer1.org2.example.com
Creating peer1.org1.example.com
Attaching to ca_peerOrg1, ca_peerOrg2, orderer.example.com, peer0.org2.example.com, peer0.org1.example.com, peer1.org2.example.com, peer1.org1.example.com
Building the fabric-sdk-java and running the unit tests
We leave the docker containers (above) running, or we restart them if they have been stopped cleanly with CTRL-C. Now we are going to open a new Cygwin prompt AS AN ADMINISTRATOR, side-by-side with the first one.
In it we will do commands:
cd /cygdrive/c/gocode/fabric_java_latest/fabric/devenv/
vagrant ssh
# Now back in the virtual image, we do commands:
cd /opt/gopath/src/github.com/hyperledger/fabric/devenv/fabric-sdk-java
mvn install
This will build the SDK and run a few tests:
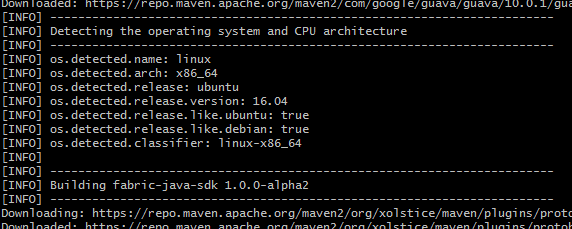
Tests will be run after the build. There will be a few java.io.NotSerializableExceptions as well as “Could not verify signature” verbose warnings, but ultimately, the tests will all run without error. Ultimately, we will obtain:
[INFO] Installing /opt/gopath/src/github.com/hyperledger/fabric/devenv/fabric-sdk-java/target/fabric-sdk-java-1.0.0-alpha2.jar to /home/ubuntu/.m2/repository/org/hyperledger/fabric-sdk-java/fabric-sdk-java/1.0.0-alpha2/fabric-sdk-java-1.0.0-alpha2.jar
[INFO] Installing /opt/gopath/src/github.com/hyperledger/fabric/devenv/fabric-sdk-java/pom.xml to /home/ubuntu/.m2/repository/org/hyperledger/fabric-sdk-java/fabric-sdk-java/1.0.0-alpha2/fabric-sdk-java-1.0.0-alpha2.pom
[INFO] ————————————————————————
[INFO] BUILD SUCCESS
[INFO] ————————————————————————
[INFO] Total time: 01:19 min
[INFO] Finished at: 2017-05-16T19:36:18+00:00
[INFO] Final Memory: 35M/383M
[INFO] ————————————————————————
Here are the complete listings for the “mvn install” and “docker compose” commands. Once again I saved these text files with a .doc file extension so WordPress would like it. You should look at them in Notepad++:
Running the end-to-end Java integration tests
In the same Cygwin prompt as the previous section, do the command:
mvn failsafe:integration-test -DskipITs=false
This will give us:
[WARNING] File encoding has not been set, using platform encoding UTF-8, i.e. build is platform dependent! The file encoding for reports output files should be provided by the POM property ${project.reporting.outputEncoding}.
[INFO] ————————————————————————
[INFO] BUILD SUCCESS
[INFO] ————————————————————————
[INFO] Total time: 37.512 s
[INFO] Finished at: 2017-05-16T21:02:19+00:00
[INFO] Final Memory: 13M/170M
[INFO] ————————————————————————
Here are the text file listings for the “mvn integration” command as well as for the containers:
We’re done for now. I recommend you CTRL-C, CTRL-D, vagrant halt, exit, log out of your Windows session, log back in and 7-Zip the C:\gocode folder again.
Building the Fabric HTML documentation with Sphinx
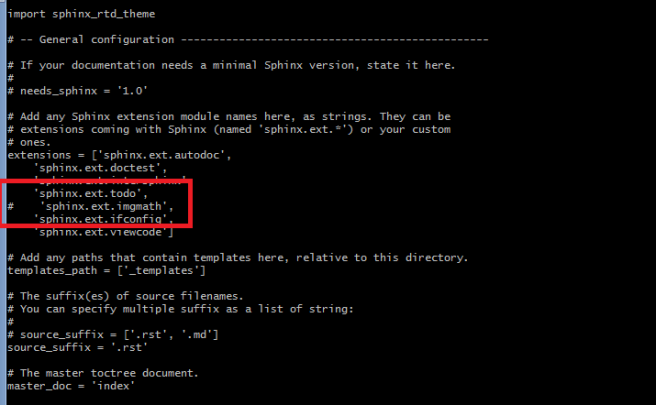
There is an issue with Sphinx’s imgmath python extension on Windows, related to versions of Sphinx and at what point in the program launch are the configured extensions validated. Here is how I worked around it.
Open a new Cygwin terminal. Edit the conf.py file.
vi /cygdrive/c/gocode/fabric_java_latest/fabric/docs/source/conf.py
Add a # comment character at the beginning of line:
‘sphinx.ext.imgmath’,
as below:
# Save in vi with:
:wq
cd /cygdrive/c/gocode/fabric_java_latest/fabric/docsecho
make html
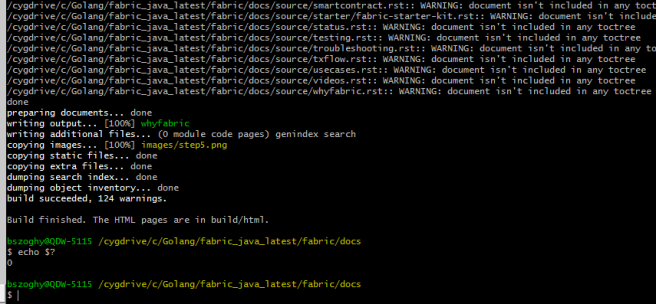
As indicated, the web pages are created under
C:\gocode\fabric_java_latest\fabric\docs\build\html\
OK, all done. Now you are ready to get started with Java on the Hyperledger Linux virtual image.
(end)
Bertrand Szoghy, 2017-05, Quebec City.

Bertrand, thanks for the post. Did you install cywin 32 bit or 64 bit?
LikeLike
Hi there,
Cygwin 64bit, as my Windows 7 is 64bit.
LikeLike
Bertrand, when I was trying to follow installation steps for gnupg *after installing cygwin), this error popped up:
PS C:\Windows\system32> cyg-get gnupg
Attempting to install cygwin packages: gnupg
C:\ProgramData\chocolatey\lib\cyg-get\tools\cyg-get.ps1 : Please ensure you have Cygwin installed.
To install please call ‘choco install cygwin’ (optionally add -y to autoconfirm).
ERROR: This command cannot be executed due to the error: The system cannot find the file specified.
At line:1 char:2
+ & <<<< 'C:\ProgramData\chocolatey\lib\cyg-get\tools\cyg-get.ps1' gnupg
+ CategoryInfo : NotSpecified: (:) [Write-Error], WriteErrorException
+ FullyQualifiedErrorId : Microsoft.PowerShell.Commands.WriteErrorException,cyg-get.ps1
Referred and tried suggestions on: https://github.com/chocolatey/chocolatey-coreteampackages/issues/176 , and some other suggested links in it, however hasn't worked.
Any suggestions what/where to look at? Thanks Bertrand!
LikeLike
Hi Adam!
Looks like no Cygwin. Is it under C:\tools ? Or not?
Assuming you’ve installed it, it must be a matter of the Windows command prompt finding it on its path. You might have forgotten a restart of Powershell which is the Windows way of the prompt grabbing a system variable that has just been set.
Might or might not be useful as well: by habit, I always start DOS or Powershell prompts AS AN ADMINISTRATOR and add paths to the SYSTEM path variable, not the user’s.
Double check the above, followed by a quick session or Windows reboot and you will likely be able to move on to the next challenge.
Hope this helps and thanks for reading.
LikeLike
Thanks for the response Bertrand! Did as suggested, to no avail however. Still no further insights from the github thread on the same issue. If you don’t mind, which version of cygwin did you install? Maybe that could help discover some learning insights in the meantime. Thanks again for sharing your experience, and developing new posts continually. Cheers!
LikeLike
Hello,
My Cygwin64 Windows shortcut points to:
C:\tools\cygwin\bin\mintty.exe -i /Cygwin-Terminal.ico –
In Windows Explorer, if I right-click on C:\tools\cygwin\bin\mintty.exe > Properties > Details I have “Product version” 2.7.6 and “File version” 2.7.6.0
To type up my posts, I usually take a lot of notes as I go along, and when I am satisfied, I re-do the procedure a second time and finish typing up the blog post with a lot of screen captures. So I do each procedure at least twice. Right now I have both a Windows 7 Pro SP1 desktop and a laptop with everything described on this blog up and running.
Related system variables I have set:
Name: ChocolateyInstall Value: C:\ProgramData\chocolatey
Name: GOBIN Value: C:\gocode\src\workspace\first\bin
Name: GOPATH Value: C:\gocode
Name: GOROOT Value: C:\Go\
Name: JAVA_HOME Value: C:\Program Files\Java\jdk1.8.0_131
Name: NUMBER_OF_PROCESSORS Value: 8
Name: Path Value: C:\tools\cygwin\bin;C:\ProgramData\Oracle\Java\javapath;C:\IBM\IBMIMShared\plugins\org.eclipse.tptp.platform.ac.win_em64t_4.5.203.v201406201237\agent_controller\bin;C:\IBM\IBMIMShared\plugins\org.eclipse.tptp.platform.ac.win_em64t_4.5.203.v201406201237\agent_controller\lib;C:\IBM\IBMIMShared\plugins\org.eclipse.tptp.platform.ac.win_em64t_4.5.203.v201406201237\agent_controller;C:\Windows\system32;C:\Windows;C:\Windows\System32\Wbem;C:\Windows\System32\WindowsPowerShell\v1.0\;C:\Program Files (x86)\Microsoft SDKs\TypeScript\1.0\;C:\Program Files\Microsoft SQL Server\120\Tools\Binn\;C:\Program Files\;C:\apache-ant-1.9.6\bin;C:\wamp64\bin\php\php5.6.25;C:\Program Files\IBM\Bluemix\bin;C:\Program Files (x86)\Java\jre1.8.0_131\bin;C:\Program Files\Java\jdk1.8.0_131\bin;C:\Program Files\erl8.1\bin;.;C:\Program Files (x86)\Skype\Phone\;C:\ProgramData\chocolatey\bin;C:\HashiCorp\Vagrant\bin;C:\Go\bin;C:\Program Files\Microsoft SQL Server\130\Tools\Binn\;C:\Program Files\dotnet\;C:\apache-maven-3.5.0\bin;C:\Gradle\gradle-3.5\bin;C:\gocode\bin\;C:\Program Files\Git\cmd
Name: PROCESSOR_ARCHITECTURE Value: AMD64
Name: PROCESSOR_IDENTIFIER Value: Intel64 Family 6 Model 60 Stepping 3, GenuineIntel
Name: SPHINXBUILD Value: C:\tools\cygwin\bin\sphinx-build –ext-imgmath
Name: VBOX_MSI_INSTALL_PATH Value: C:\Program Files\Oracle\VirtualBox\
Every time I need to install Cygwin or MinGW by themselves, I run into trouble. The Chocolatey and Vagrant install steps I describe, as well as some of the Cygwin install steps I picked up from the brilliant Vagrant Pluralsight course, “Introduction to Versioning Environments With Vagrant” by Wes Higbee. I found Wes’ approach so much better than what I usually do. His video course is at https://www.pluralsight.com/courses/vagrant-versioning-environments
Pluralsight have a free trial. Highly recommended.
Hope this helps!
LikeLike
Hello Bertrand,
Thanks for the detailed Steps
I tried cloning github.com/hyperledger/fabric-sdk-java and run the unit Test
When i run using mvn test,i get the following error
Caused by: java.io.FileNotFoundException: /home/faizal/Projekcts/sample/fabric-sdk-java/target/protoc-dependencies/89c38d9d9690c5948055933a19673654/google/type/timeofday.proto (No such file or directory)
Can you guide me to know what mistake is it ?
LikeLike
Hello! First, do you have a typo in “Projekcts” somewhere? (instead of “Projects”). Second, the purpose of a .proto file (protocol buffers) is to generate .java code. Maven does this complicated step seamlessly by doing a “Maven build”. The catch is, by convention, .proto files have to be in a certain folder location. I guess you are using Linux directly instead of the Vagrant image. In that case, there might be a dependency issue.
LikeLike
Hi Bertrand,
Thanks for the reply.Yes i have done a type mistake while mkdir .It is Projekcts.
Second thins ,yes it is Ubuntu machine.To check it i created Maven project n eclipse and created a proto file and tried to create Java classes out of it.It generated the file
/home/faizal/eclipse-workspace/Faizalprot/target/protoc-dependencies/89c38d9d9690c5948055933a19673654/google/xxx.proto files.
So i expect the same to generated when i run the fabric-sdk-java using mvn test.As suggested by you in case if it is dependancy how to narrow down to find what the issue is ?Any suggestions ?
LikeLike
Hello Bernard,
I copied the target/protoc-dependencies/89c38d9d9690c5948055933a19673654/google/xxx.proto files and pasted it into fabric-sdk-java ,Then ran mvn test.The build was successful.
I’m under the assumption that either build that folder to be in place ,and if it is not there it is not creating it .Is my understanding correct ?
LikeLike
Hello again,
It must be an Eclipse Maven project.
By Maven convention, the source .proto files must be placed under the project’s /src/main/proto folder.
After you have added the dependencies in the pom.xml
And done Maven > Update project to pull those dependencies, you do a Project Build and the generated Java .java sources will appear in your project under /target/generated-sources/
My understanding is the Hyperledger Fabric unit tests and integration tests copy those sources under /src before doing further work.
For my gRPC blog example, I manually copy the generated files under /src (and edit them a bit), rename the .proto file(s) to .proto.txt before once again building the project.
Cheers!
LikeLike
Thanks Bernard
LikeLike
Hi Bertrand, Is there any tutorials of yours to work in Ubuntu
LikeLike
Hi! Anything with Linux Mint applies — but you will need the latest version, Hyperledger and more precisely gRPC is sensitive to Gnu C library versions and kernel support.
LikeLike